Clip-in hair extensions are an easy way for anyone to add volume and length to their hair. Mostly people prefer to increase hair length by applying easy-to-use extensions. They usually don’t prefer the sewn-in extensions as they become difficult to take out after use. You may save money and create something unique by learning how to manufacture your clip-in extensions. Below is a comprehensive guide on how to make clip in hair extensions at home.
Materials Needed
Before starting, gather the following materials:
• The wefts of human or synthetic hair
• Hair extension clips
• Needle and thread of the same color
• Scissors
• Measuring tape
• Hair clips for sectioning
Step 1: Measure and Cut the Wefts
Subsequently, the wefts must be measured and cut to the desired length of the hair weave; wefts should neither be excessively wide nor narrow as this would result in bulkiness or an excessively thin weave.
Take measurements of the width of the sections of your head where you wish to fix the extensions. These are at the nape, crown, and sides. Trim the wefts to the following dimensions: To make it even fuller, one two, or three wefts can be sewn together to create the desired density.
Step 2: Prepare the Wefts
After cutting the wefts to the required length, you may sew them if you desire more quantity. To prevent standing out, when sewing, use a needle and thread that complements the color of your hair. Stitch along the upper edge of the weft after stacking two or three wefts on top of each other.
Step 3: Sew the Clips
Attach the hair extension clips to the wefts using the sewing machine. The clips should be placed at appropriate intervals to ensure that they lock perfectly into place. It is normal for a 4-inch weft to have two clips and for larger wefts, it may take three or more clips. It is also important to ensure that the clips are properly sewn on by threading through the holes and the weft several times.
Step 4: Blending Extensions with Natural Hair
Ensure that the extensions are cut in a way that they can be easily blended with the natural hair. Depending on the outcome you’re going for, you can mix and make them thin to your desired extent. To ensure that the cutting is even on both sides, it is ideal to complete this step with a companion. Human hair extensions, for instance, can also be colored or styled to blend with the natural hair.
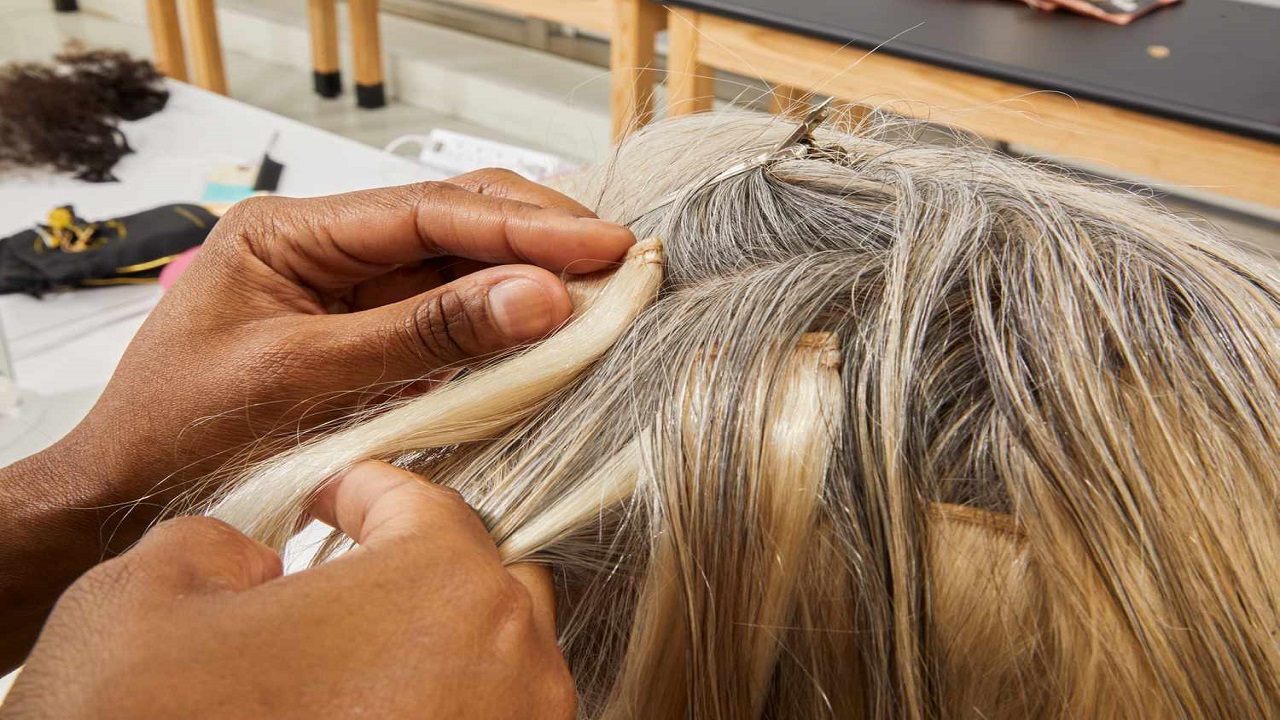
Step 5: Application
To apply the clip-in extensions, first, part your hair as shown below: Cut a horizontal part using a comb and set the upper segment aside. Pull open the clips on the weft and place them near the scalp, from the nape up towards the crown. Make sure the clips are properly positioned and blend with the natural hair without being noticeable.
Step 6: Style and Enjoy
After all the wefts are installed, you can blend the extensions with your hair using either a flat iron or a curling iron. You may wash and set your hair in any style you wish. Your clip-in extensions are now ready to wear and you can instantly have longer and thicker hair for any event.
Conclusion
In this way, it is possible to obtain beautiful clip-in hair extensions at home, which will meet personal requirements and desires. Appreciate the convenience and the effect they add to your hair care process!